Applies to: Ubuntu 15.10 (Wily Werewolf), VMware Workstation 12
Legacy guide: This article documents the 2015 installation process for Ubuntu 15.10 (Wily Werewolf) in VMware Workstation. Ubuntu 15.10 reached end of life on July 28, 2016 and no longer receives security or package updates.
The original Ubuntu 15.10 installation media remains available from the Ubuntu old-releases archive. For new deployments, use a currently supported Ubuntu release.
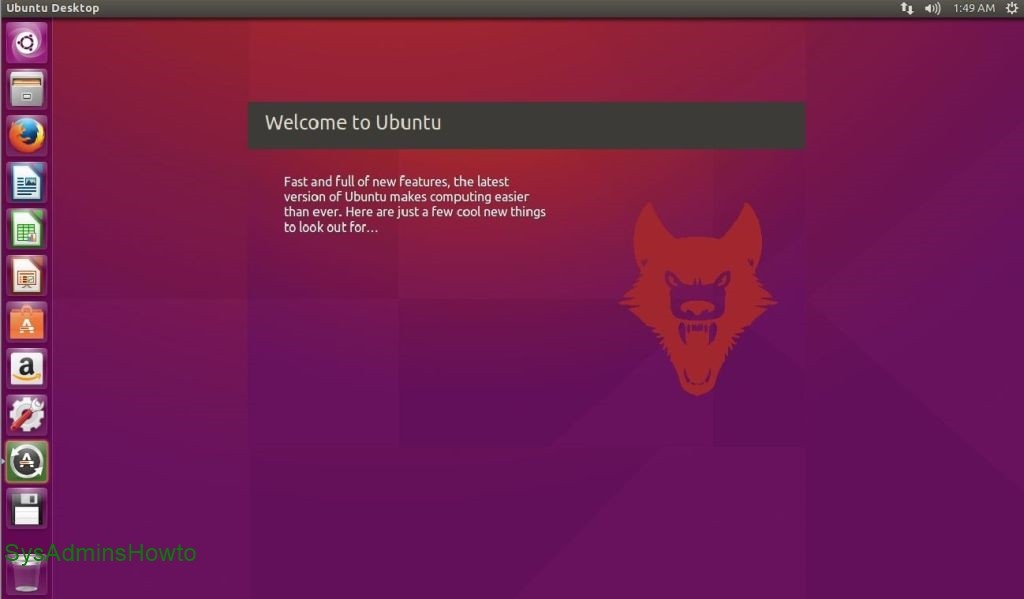
This step-by-step tutorial shows you how to install Ubuntu 15.10 (Wily Werewolf) in VMware Workstation with Easy Install feature but you can also use VMware Player which is free. This tutorial also helps if you install Ubuntu 15.10 on physical hardware. If you are new to Ubuntu or you want to explore new features, It is very safe to install Ubuntu 15.10 as a virtual machine inside VMware Workstation.
VMware Workstation 12 provided an Easy Install workflow that automated much of the Ubuntu guest installation after the ISO was selected. For the VMware generation used in this article, see VMware Workstation 12 Pro New Features.
What is Ubuntu Linux?
Ubuntu is one of the most popular Linux distribution. Ubuntu is based on Debian but it uses a custom desktop user interface called “Unity”. The Ubuntu project has a focus on providing a solid desktop experience. It offers releases every six months, with a more stable LTS (long term support) release every two years. Ubuntu is easy to install and comes with a fairly complete set of applications installed by default including LibreOffice.
What’s New in Ubuntu 15.10 Wily Werewolf
Ubuntu 15.10 was released on October 22, 2015. It shipped with Linux kernel 4.2, updated OpenStack components, changes to scrollbars, persistent network interface naming and other desktop and platform updates. As a non-LTS release, Ubuntu 15.10 had a nine-month support lifecycle and reached end of life on July 28, 2016.
Ubuntu 15.10 Wily Werewolf Installation Steps in VMware Workstation
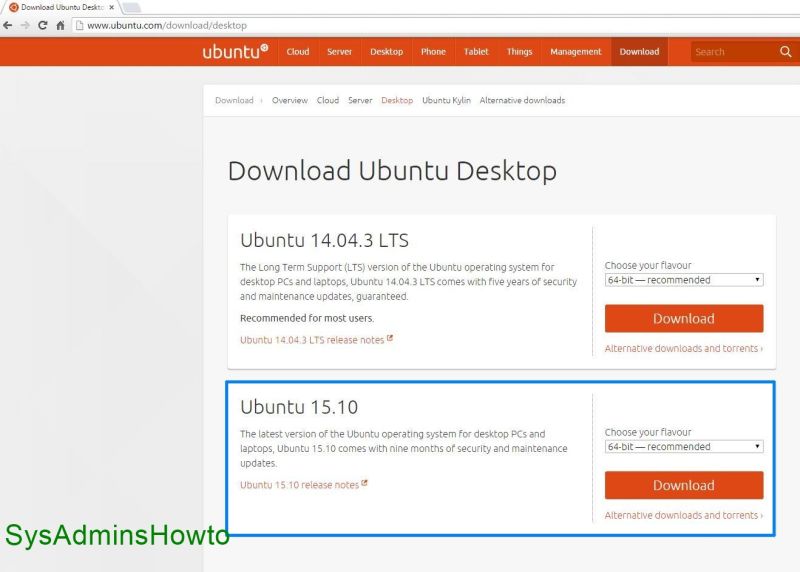
1. Download the historical Ubuntu 15.10 Wily Werewolf ISO from the Ubuntu old-releases archive. This tutorial uses the Ubuntu 15.10 32-bit Desktop edition.
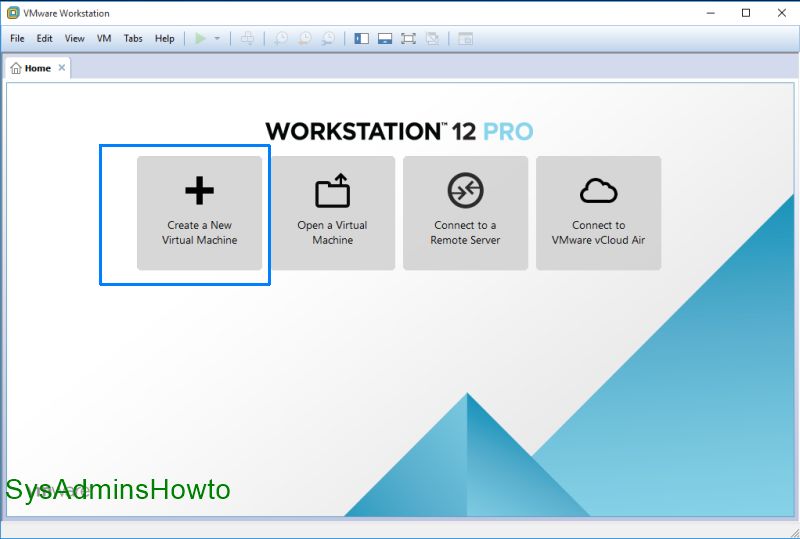
2. Open VMware Workstation and then click Create a New Virtual Machine.
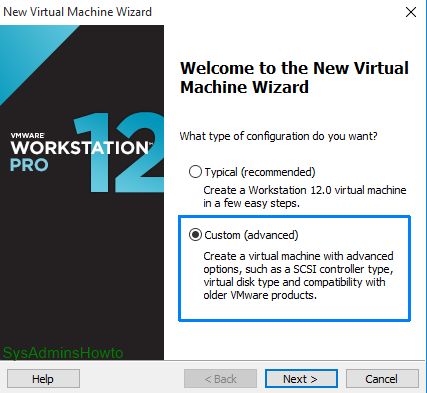
3. You can go with custom (advanced) at Welcome to the New Virtual Machine Wizard screen. It provides more options.
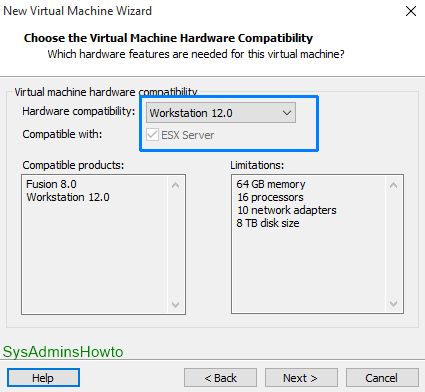
4. Click Next at Virtual Machine Hardware Compatibility.
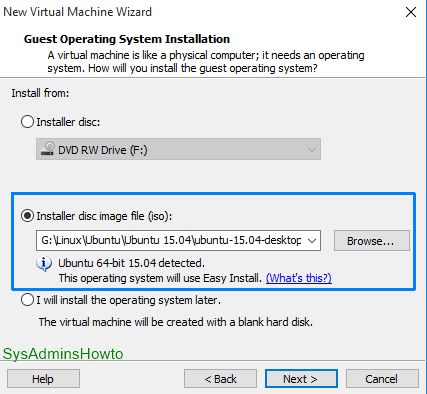
5. Browse to Ubuntu 15.10 installation ISO media that you’ve just downloaded from official Ubuntu website. VMware installer detects the media as Ubuntu 15.10 and Easy Install feature is now available for this installation.
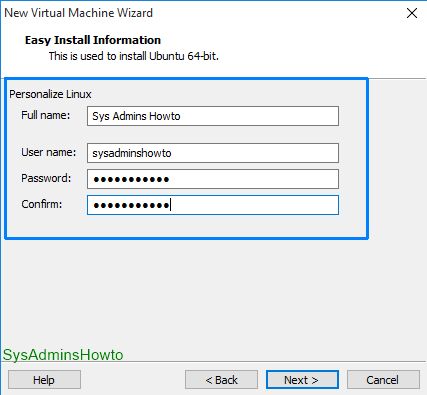
6. Write your “Full name”, “User name” and “Password” at At the Personalize Linux.
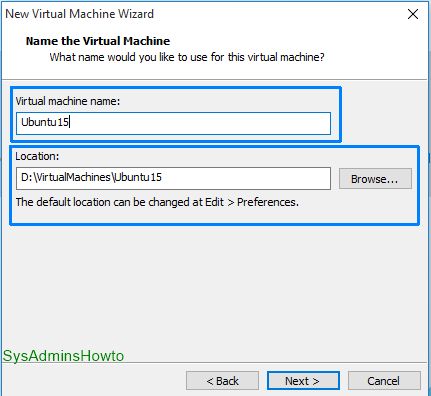
7. Give a name and set location for your ubuntu virtual machine files.
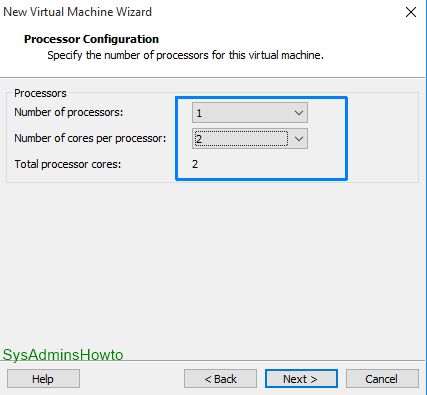
8. Set how many virtual CPU and cores you want to use. I want ubuntu vm more powerful than default and I give 1 processor and 2 cores.
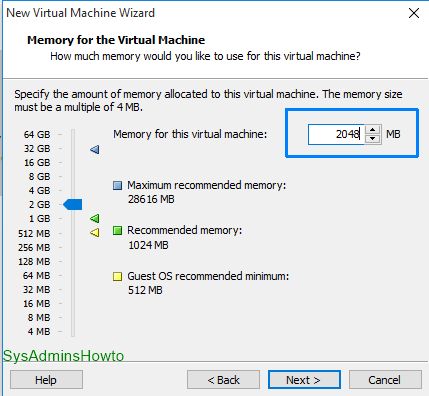
9. Specify how much memory can Ubuntu VM use. I set it as 2048 MB. You can adjust this setting according to your needs or physical resources that you currently have.
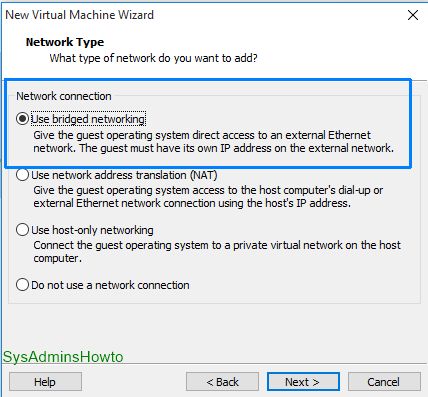
10. Select Use bridged networking. Virtual machine can connect to physical network directly.
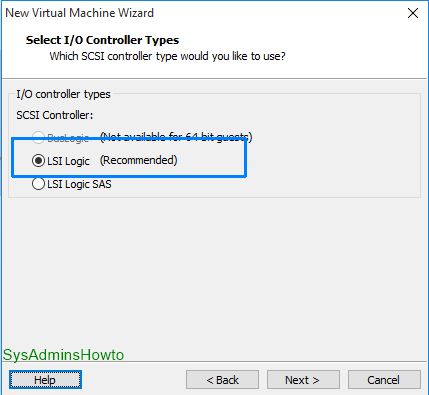
11. Click Next at the Select I/O Controller Types.
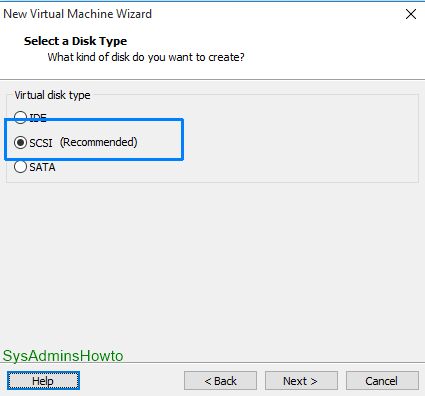
12. Click Next to continue at Select a Disk Type.
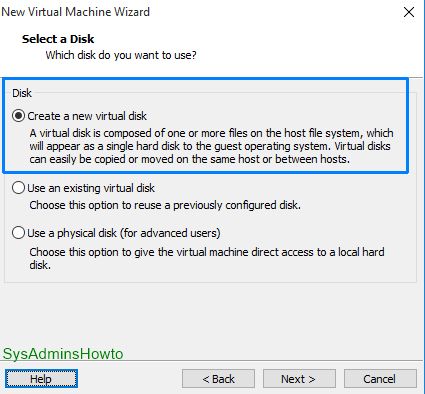
13. Click Next to create a new virtual disk for your virtual machine.
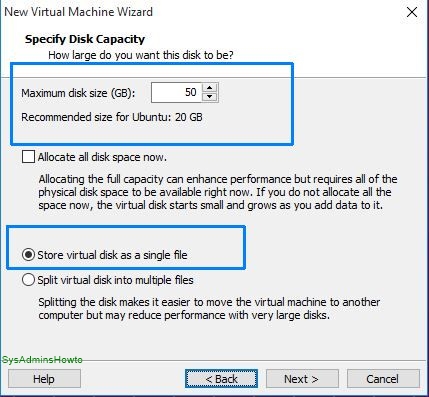
14. Specify how much disk space you want to use for Ubuntu VM. I set it as 50 GB. I also selected the Store virtual disk as a single file option for this example.
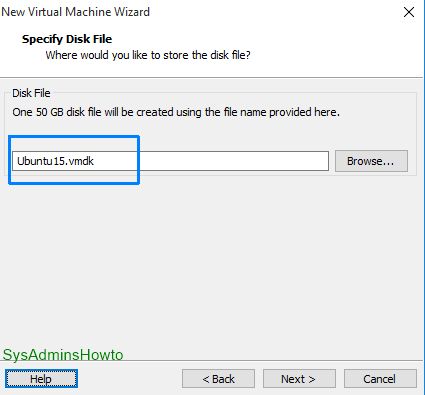
15. Click Next at Specify Disk File.
16. Select Power on this virtual machine after creation and then Click Finish.
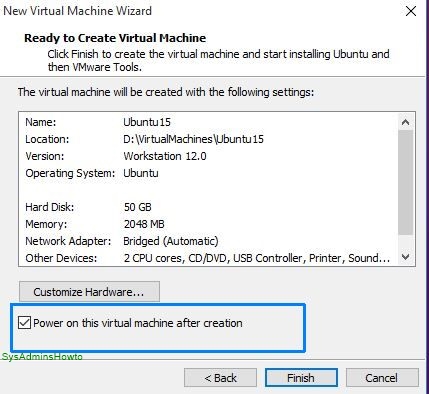
17. When Ubuntu 15.10 Installation process begins, Installer does its jobs automatically with VMware Workstation Easy Install feature. Installation process takes approximately 5-10 minutes.
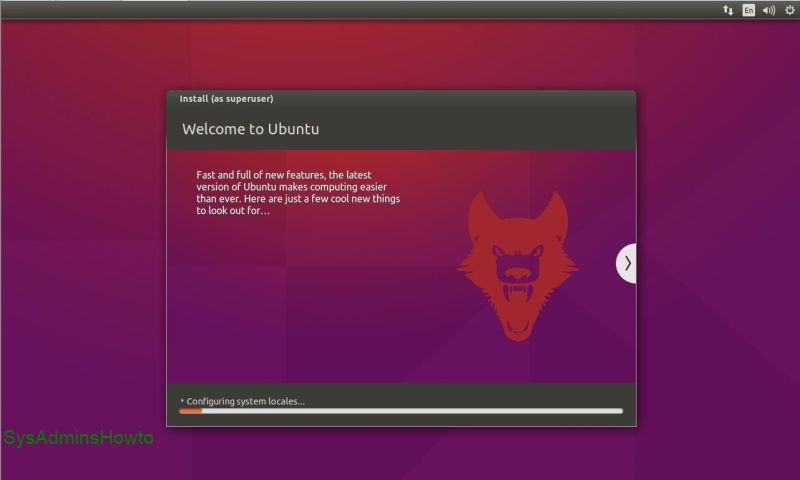
18. After installation is completed, Ubuntu 15.10 virtual machine reboots. At login screen, type user name and password that you specified in step 6.
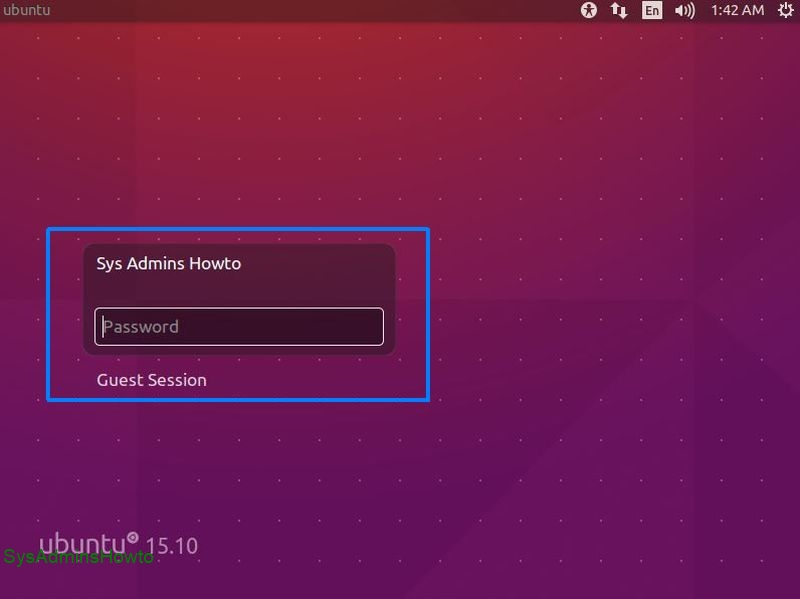
Congratulations, you’ve just successfully installed Ubuntu 15.10 (Wily Werewolf) in VMware Workstation. During the installation, open-vm-tools is also installed. So, you can use drag-and-drop file between host and guest operating system and automatic screen resolution adjustment features.

I hope this ubuntu 15.10 installation tutorial is helpful for you. If you liked it or found useful, feel free to like or share it. Any questions or comments or suggestions are welcomed!

Cloud and infrastructure professional with nearly two decades of experience in enterprise IT environments, spanning public cloud, private cloud, and hybrid architectures.